-
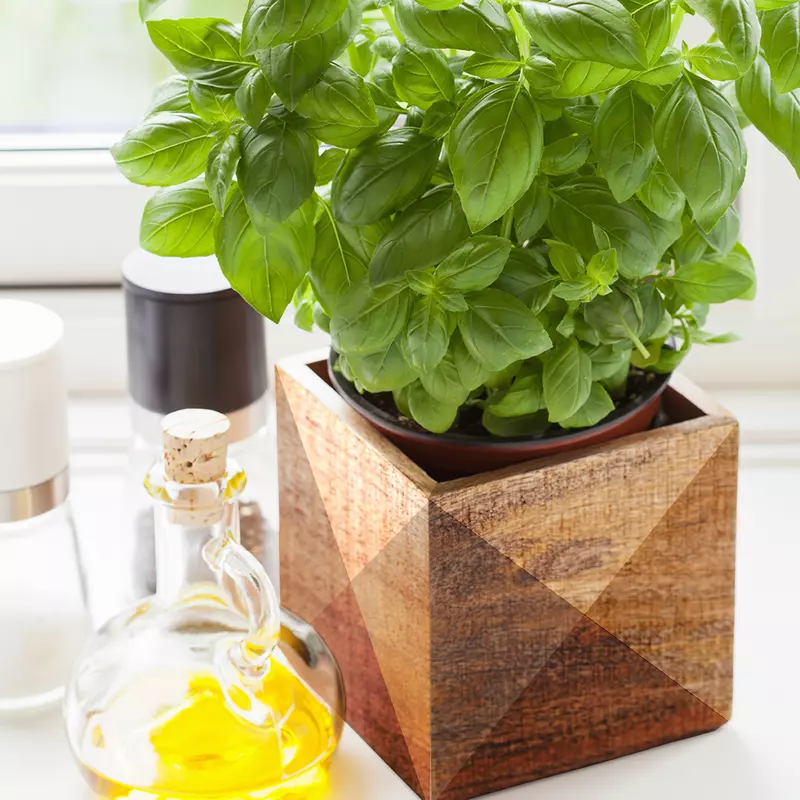
Aj jeden odtieň lazúry na drevo dokáže vykúzliť dynamický a vizuálne atraktívny povrch. Úpravou úrovne riedenia môžete dosiahnuť jemné prechody, ktoré zachovávajú prirodzenú textúru dreva. Lazúry na vodnej báze by ste mali riediť vodou, zatiaľ čo tie na báze rozpúšťadla vyžadujú vhodné riedidlo – vždy ho pridávajte postupne a v malých množstvách, aby ste dosiahli rôzne stupne priehľadnosti s rovnakou farbou. Na zabezpečenie čistých prechodov medzi rôznymi časťami použite maskovaciu pásku. Drevené kvetináče na kuchynské bylinky alebo kvety je možné natrieť po častiach – od jemne tónovaných až po sýto sfarbené. Podobný efekt sa dá dosiahnuť aj na iných drevených predmetoch, ako sú rámy, malé poličky alebo iné časti nábytku. Keď si pohráte s rôznymi variáciami tónov v rámci jedného odtieňa vytvoríte decentný, no zároveň výrazný farebný akcent.
-
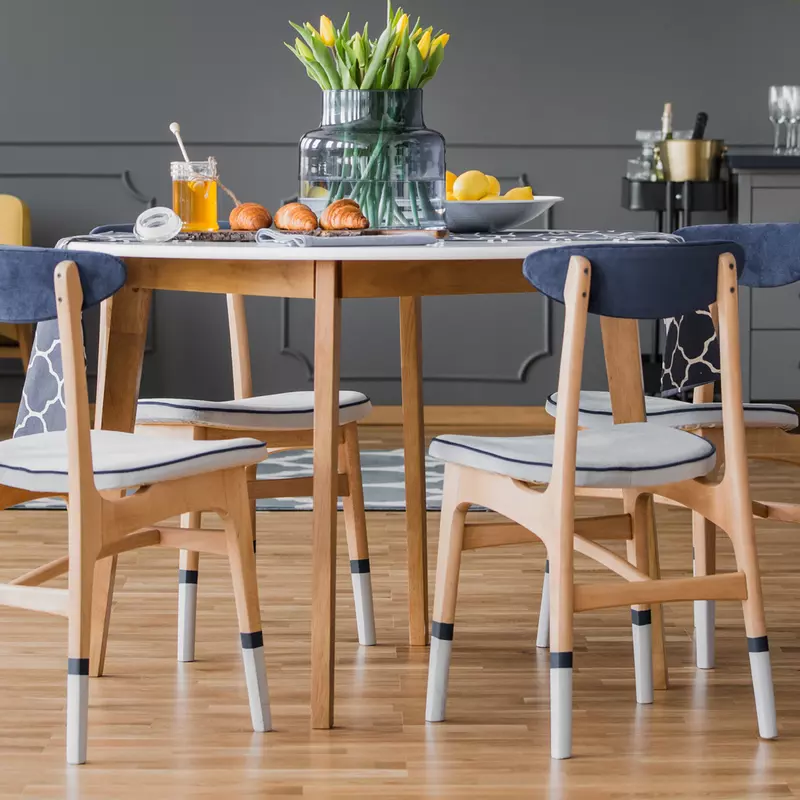
Pomocou len niekoľkých jednoduchých krokov môžete premeniť obyčajný stôl alebo stoličku na niečo výnimočné. Zvyšnú farbu použite na vyfarbenie spodnej časti nôh – pre minimalistický vzhľad zvoľte rovnakú výšku, alebo môžete experimentovať s rôznymi výškami a farbami. Každý kus môže mať svoj vlastný odtieň alebo jedinečný „ponorený“ efekt. Pre zabezpečenie čistého prechodu medzi natretými a nenatretými oblasťami použite maskovaciu pásku, aby farba nestekala na priľahlé povrchy. Naneste tenkú, rovnomernú vrstvu – v prípade potreby dve vrstvy. Takto dodáte hravý akcent vášmu existujúcemu nábytku a vytvoríte ucelený, farebne zladený vzhľad – a to všetko bez väčších úprav a s použitím materiálov, ktoré už máte doma. Pásku odstráňte opatrne – odlepujte ju pomaly, pod malým uhlom a čo najbližšie k povrchu.
-
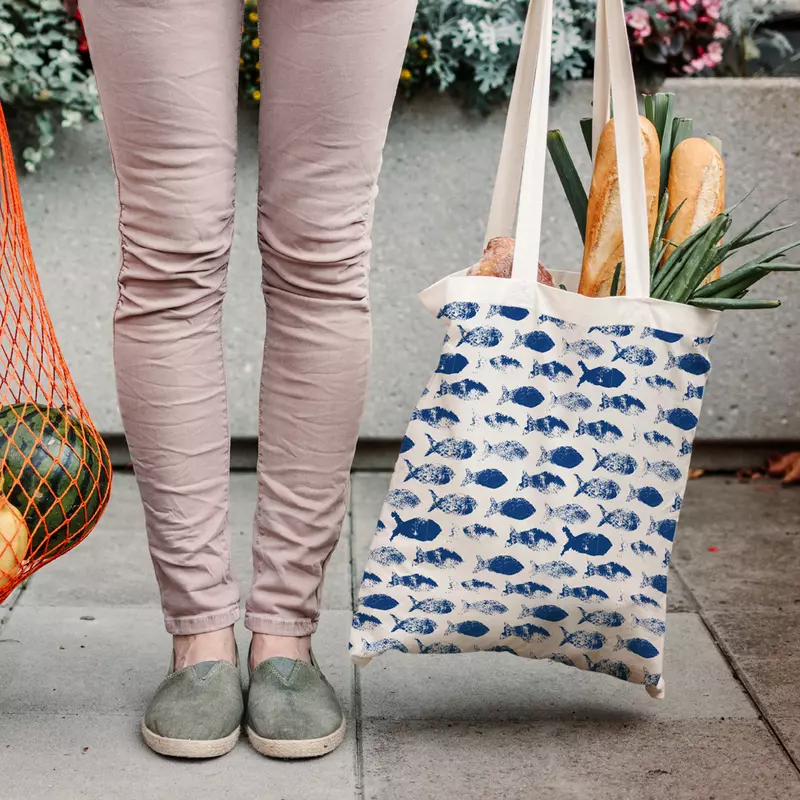
Zvyšné nátery na drevo alebo kov neslúžia len na renováciu plotov a nábytku – s trochou kreativity ich môžete premeniť na skutočné umelecké diela na látke. Viacúčelová bavlnená taška, či už na pláž alebo na nákupy, sa dá ľahko premeniť na štýlový a farebný doplnok. Vystrihnite jednoduché tvary z hustej peny alebo mäkkej gumy a pripevnite ich na drevenú palicu alebo inú pevnú rukoväť. Vďaka tomu vznikne praktická pečiatka, ktorá vám umožní rovnomerne naniesť náter na látku. Pre viacfarebný efekt si pripravte niekoľko rôznych pečiatok a farieb. Po natretí tašku rozložte na plocho a nechajte ju dôkladne vyschnúť – odporúčame ju nechať aspoň pár dní v pokoji. V závislosti od typu farby a látky môžete vzor v prípade potreby ďalej upraviť žehličkou (s použitím papiera na pečenie ako bariéry).
-

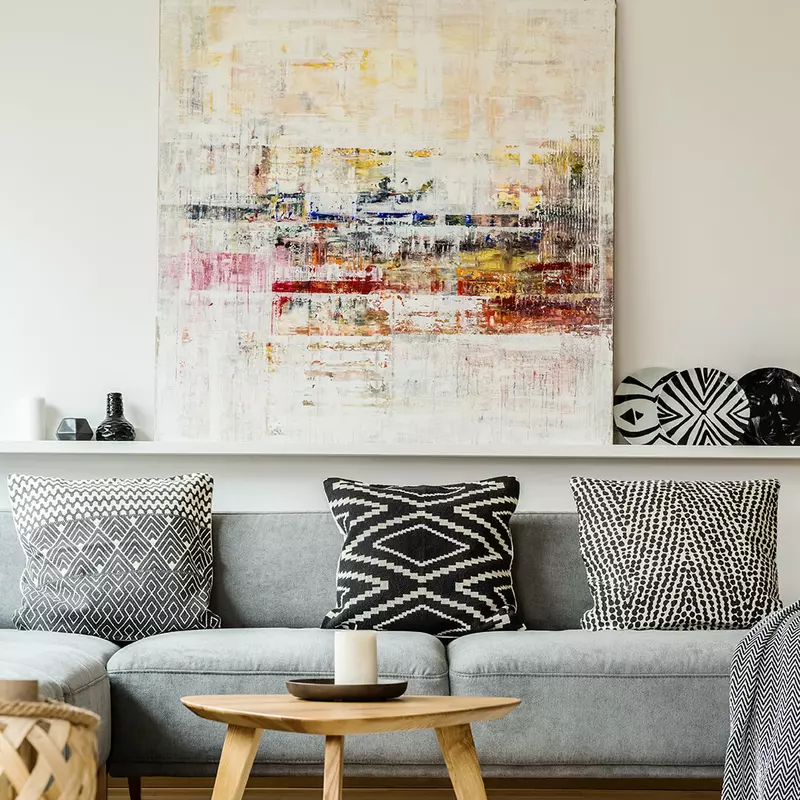
Umenie nevytvárame vždy len štetcom – niekedy sa vytvára špachtľou! Zvyšky vyrovnávacej hmoty predstavujú skvelú príležitosť na vytvorenie moderného, trojrozmerného nástenného umeleckého diela. Pomocou murárskej lyžice naneste tenkú rovnomernú vrstvu tmelu na plátno alebo drevený panel – dosť na to, aby sa zakryl povrch, ale nie tak hrubú, aby pri schnutí praskala. Experimentujte aj so smerom ťahov a s opakujúcimi sa vzormi. Až keď vyrovnávacia hmota úplne zaschne, môžete určité plochy zvýrazniť pomocou zvyšnej farby na steny – ideálne mierne zriedenou, aby neprekryla štruktúru. Na záver vždy naneste vrstvu bezfarebného laku. To nielen chráni pred prachom a nečistotami, ale tiež zaisťuje jeho trvanlivosť a lesklý vzhľad.
-
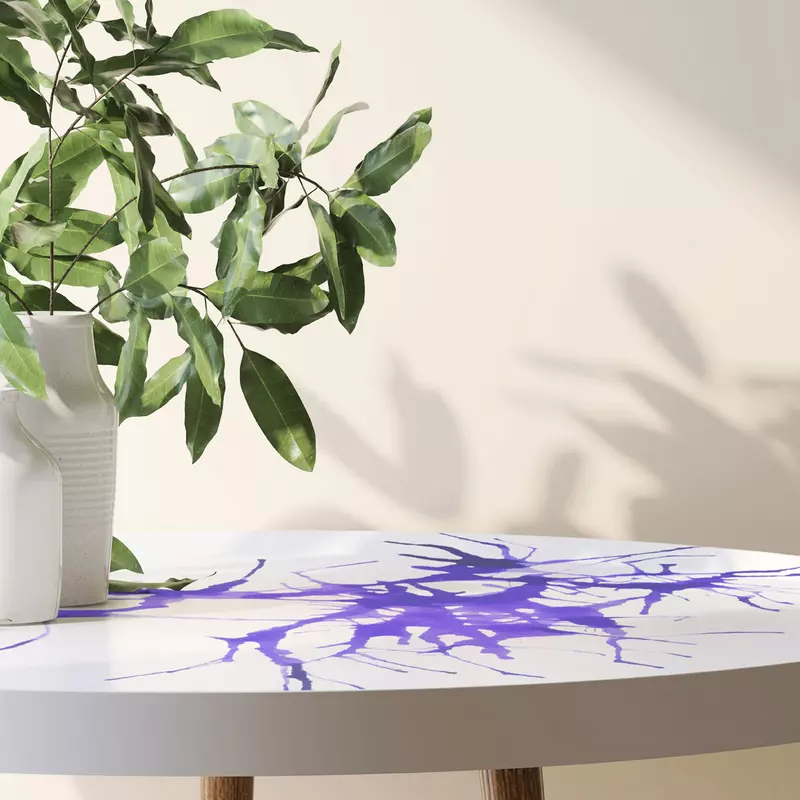
Staršie alebo opotrebované kusy nábytku ponúkajú skvelú príležitosť na experimentovanie.Pred nanesením farby si dôkladne pripravte povrch – prebrúste ho, očistite a v prípade potreby naneste najprv základný náter, aby bol finálny náter odolnejší. Potom naneste kvapky farby na vybraný povrch. Množstvo, veľkosť a umiestnenie každej kvapky bude závisieť od požadovaného vzhľadu. Na nanášanie farby môžete použiť kvapkadlo, štetec alebo drevenú tyčinku. Farba by mala byť mierne zriedená, aby sa dobre rozotierala, ale nie príliš stekala. Kým je farba ešte čerstvá, zapnite fén na chladný vzduch a jemne fúkajte rôznymi smermi. Krátky, presne mierený prúd vzduchu vytvorí jemné organicky sa rozprestierajúce tvary. Pre dosiahnutie presnejšieho efektu, približte fén na dosiahnutie rozmazanejšieho a náhodnejšieho rozptylu ho oddiaľte. Na zvislých povrchoch je lepšie použiť hustejšiu farbu a nanášať ju opatrnejšie, aby ste predišli stekaniu.
-
Zaslúži si vaša chodba alebo spálňa renováciu? Časť steny vo vami zvolenej miestnosti sa môže stať dokonalým plátnom pre hravý, no zároveň jednoduchý vzor – vytvorený pomocou zvyškov farby na stenu a špongie. Technika „razítkovania špongiou“ je jednoduchá a ponúka veľa priestoru pre kreativitu. Skúste experimentovať s rôznymi typmi špongií: klasické kuchynské špongie sú skvelé na čisté precízne vzory, zatiaľ čo tie s väčšími pórmi vytvárajú rustikálnejší, nerovnomernejší a umelecký efekt. Zaujímavé textúry môžete dosiahnuť aj pomocou kúskov penovej špongie alebo zvyškov baliaceho materiálu. Vytvarujte špongiu tak, aby zodpovedala vzoru, ktorý si predstavujete. Pred nanesením farby sa uistite, že špongia je suchá alebo len mierne vlhká a dôkladne vyžmýkaná. Prebytočnú farbu vždy najskôr otrite na kúsok kartónu alebo papiera –zabránite tak stekaniu farby a budete mať lepšiu kontrolu nad vzorom.
-
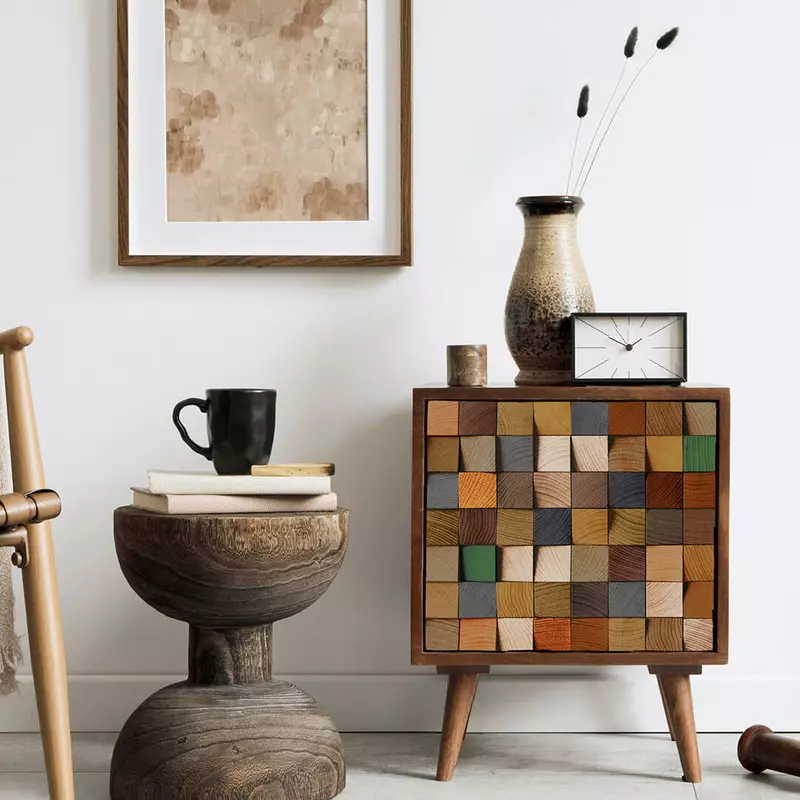
Chceli by ste si podobnú skriňu vytvoriť sami doma? Potrebujete len pár zvyškov laku v rôznych odtieňoch a drevenú hranatú lištu. Lištu nakrájajte na úzke dlaždice. V tomto prípade by mala byť jedna strana rovná a druhá strana by mala byť rezaná pod uhlom. Drevené obklady pred nanesením impregnácie a lazúry dobre obrúste a očistite riedidlom. Keď je drevo suché, usporiadajte ich v požadovanom poradí a pripravte rôzne odtiene. Zvyšky lazúrových náterov môžete medzi sebou miešať a rozširovať tak svoju farebnú paletu. Len pozor, aby ste nemiešali nátery na vodnej báze s nátermi na báze rozpúšťadiel a naopak. Jemné prechody medzi farebnými tónmi sa dajú dosiahnuť aj rôznym počtom nanesení, keďže lazúry sú polopriehľadné nátery, čo znamená, že pri ďalšej aplikácii odtieň trochu stmavne. Keď náter dobre zaschne, prilepte dlaždice plochou stranou na skrinku, napríklad na stranu dvierok alebo zásuvky.
-
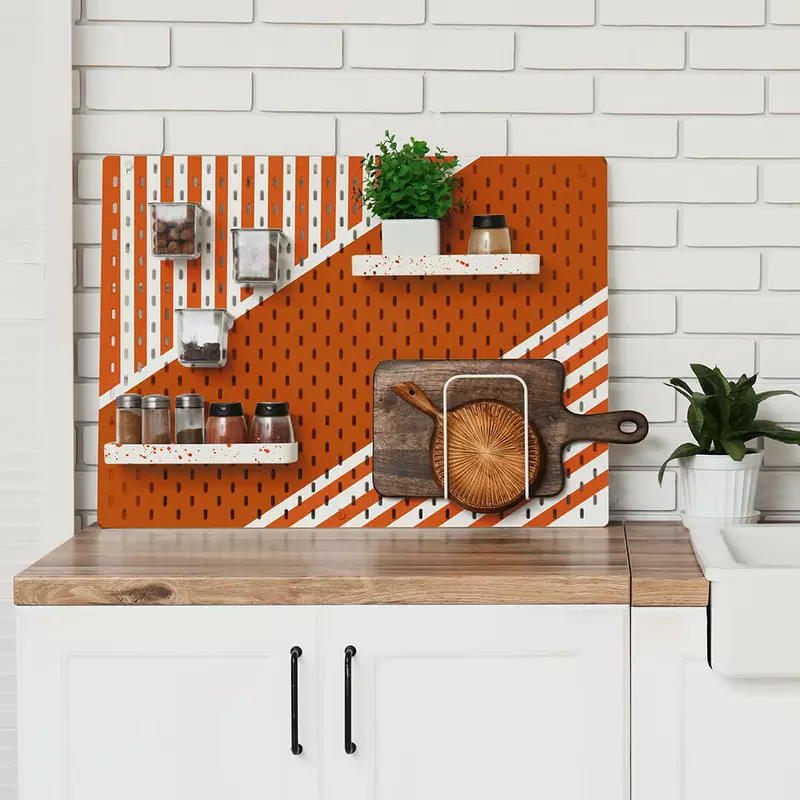
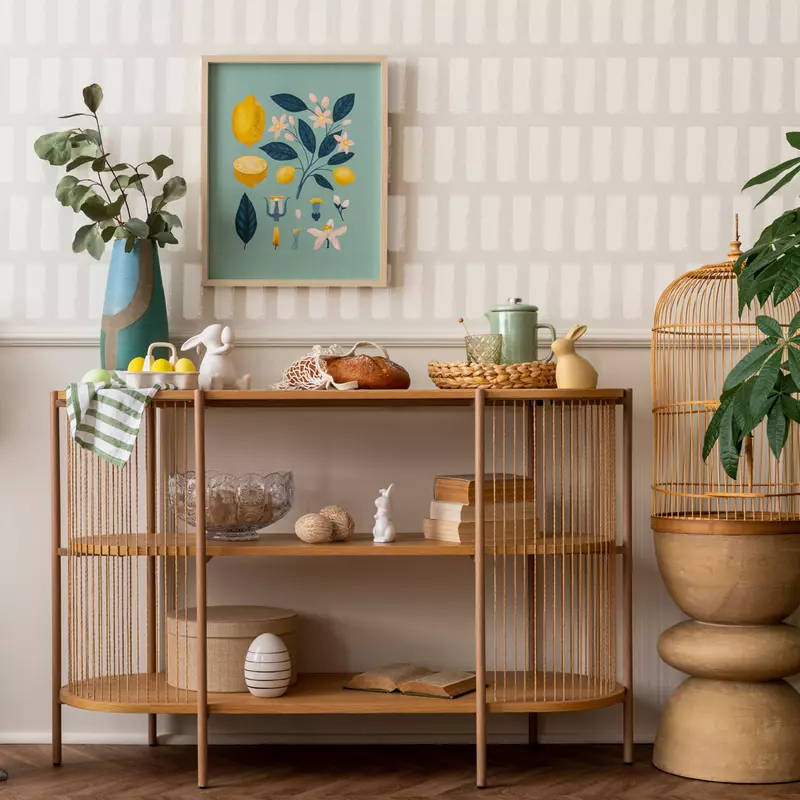
Perforovaná doska, či už drevená alebo kovová, je ideálnym plátnom na vyjadrenie vašej kreativity pomocou zvyškov vrchných náterov. Pri premyslenom usporiadaní nádob sa takáto doska dokonale začlení do každej miestnosti a ponúka nekonečné možnosti personalizácie. Máte k dispozícii iba jeden odtieň? Vyskúšajte šrafovanie! Použite maskovaciu pásku na jasné ohraničenie jednotlivých oblastí a zabráňte rozliatiu farby na priľahlé povrchy. Pri odstraňovaní pásky buďte opatrní – odlepte ju pod tupým uhlom, čo najbližšie k povrchu. Neťahajte ho z povrchu, pretože by ste mohli poškodiť čerstvo zaschnutý náter. Máte obavy, že si konečný výsledok neviete úplne predstaviť? Vezmite si kúsok papiera s rovnakou veľkosťou ako je doska a otestujte svoje nápady. Nebojte sa experimentovať.
-
Zamysleli ste sa už niekedy nad tým, ako sa zvyšky náterov na steny môžu stať základom pre krásne umelecké diela? Čisté plátno alebo aj kúsok sadrokartónu je veľmi dobrý štart pre váš ďalší kreatívny projekt. Začnite nanášaním základnej farby valčekom, potom popustite uzdu svojej fantázii a použite akékoľvek zvyšné farby, ktoré máte po ruke. Pri vytváraní reliéfnych a umeleckých textúr môžete použiť techniku s dvoma štetcami. Prvý použite na nanesenie farby na plátno, potom pomocou suchého štetca rozotrite farbu v rôznych smeroch. Môžete použiť staré a stvrdnuté štetce, ktoré už nemusia byť vhodné na iné projekty. Zaujímavé efekty môžete dosiahnuť aj kvapkaním farby na plátno, ktoré nasledovne rozotriete pomocou stierky po celom povrchu, a to v jednom alebo viacerých smeroch. Existuje veľa možností, takže namiesto jedného plátna si určite zaobstarajte dve alebo viac, a vytvorte si domácu galériu.
-

Boli by ste radi viac šetrní, keď používate baliaci papier a tašky? Pohľadajte noviny, kartónové krabice, ale aj staré mapy, ktoré sa budú výborne hodiť na vaše ďalšie balenia darčekov. So zvyškami farby na stenách môžete vytvoriť jedinečné a udržateľné darčekové balenie, ktoré vašich obdarovaných absolútne očarí! Z odhodenej špongie alebo peny vystrihnite ľubovoľné tvary ako bodky, hviezdičky alebo srdiečka, namočte ich do farby a vyrazte na baliaci papier. Na vytváranie vzorov môžete použiť aj štetce alebo vatové tampóny. Do tejto kreativity môžete zapojiť aj deti – nechajte ich, nech vytvoria vzory vlastnými prstami, ktoré darčeku dodajú špeciálny osobný vzhľad. Každý darček sa môže stať skutočným umením, odrazom vašej kreativity a pozornosti k detailom. Obdarovaní pri darčeku určite ocenia váš osobný prístup a vďačná vám bude najmä príroda.
-
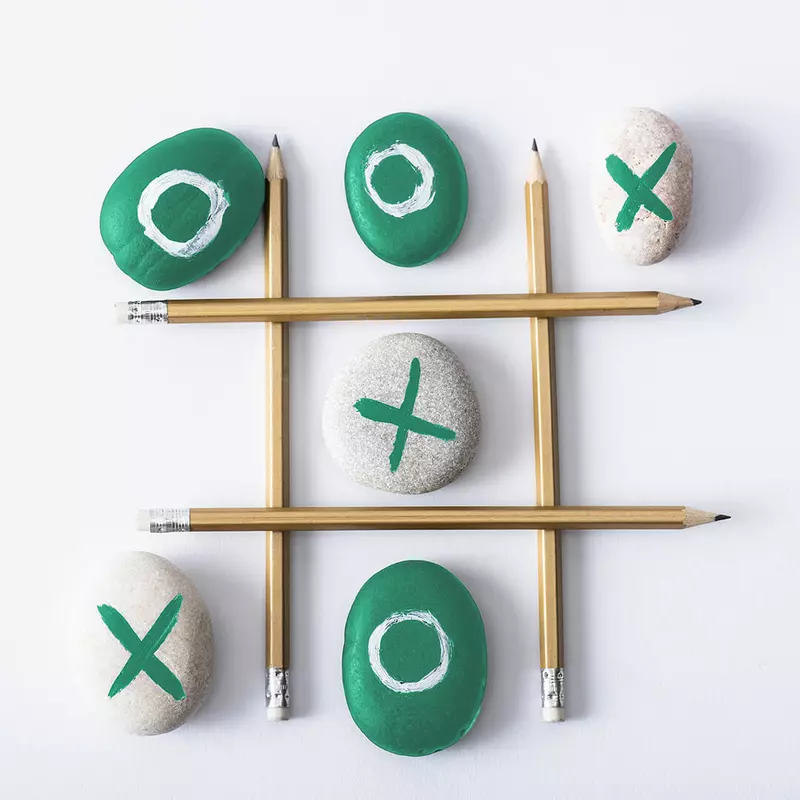
Zaujíma vás nápad vyrobiť si stolovú hru svojpomocne z prírodných materiálov, zvyškov farieb a vlastnou kreativitou? Na prechádzke popri rieke alebo mori nazbierajte ploché kamienky približne rovnakej veľkosti. Pre hru Tic-tac-toe ich budete potrebovať desať. Vyhľadajte v komore zvyšky vrchných náterov; budete potrebovať aspoň jeden odtieň a alkoholový marker. Natrite polovicu kamienkov, počkajte kým dobre uschnú, a potom na ne nakreslite krúžky. Na zvyšné kamienky nakreslite kríže a natrite ich tak, ako chcete. Hraciu dosku si môžete vyrobiť z dreva alebo kartónu a natrieť ju do zaujímavých farebných kombinácií, ktoré hru ešte viac zatraktívnia, prípadne môžete použiť vetvičky a ceruzky na označenie políčok. Ak vás táto myšlienka zaujala, čo tak vyrobiť šachové figúrky z hliny?
-
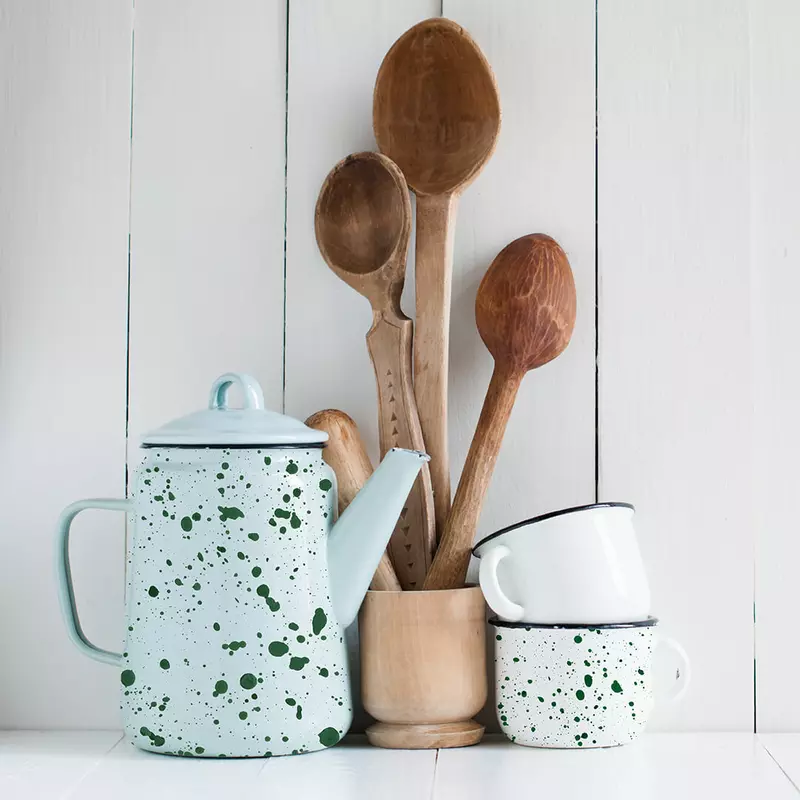
Ešte si pamätáte na lakované poháre a misky? Sú neskutočné roztomilé, ale pravdepodobne sa už nehodia na varenie. To nie je žiadny problém – jednoducho im môžete dať nový účel. S trochou dekorácie sa môžu stať nepostrádateľnou súčasťou vášho obytného priestoru. So zvyškami krycích náterov a niekoľkými farebnými ťahmi a inšpiráciou vytvoríte jedinečnú nádobu na uskladnenie kuchynského riadu alebo čerstvých byliniek. Už ste počuli o striekacej technike? Ide o jednoduchú metódu, pri ktorej ponoríte malý štetec so štetinami do farby a nanesiete ho na produkt rýchlym kĺzaním prsta po vrchnej časti štetín v smere k vám. Pred začatím striekania naneste základný náter a jednu vrstvu konečného náteru, pretože takto bude farba odolnejšia. Ochráňte okolie, vrátane steny a ruky, pretože sa s farbou dostanete do priameho kontaktu.
-
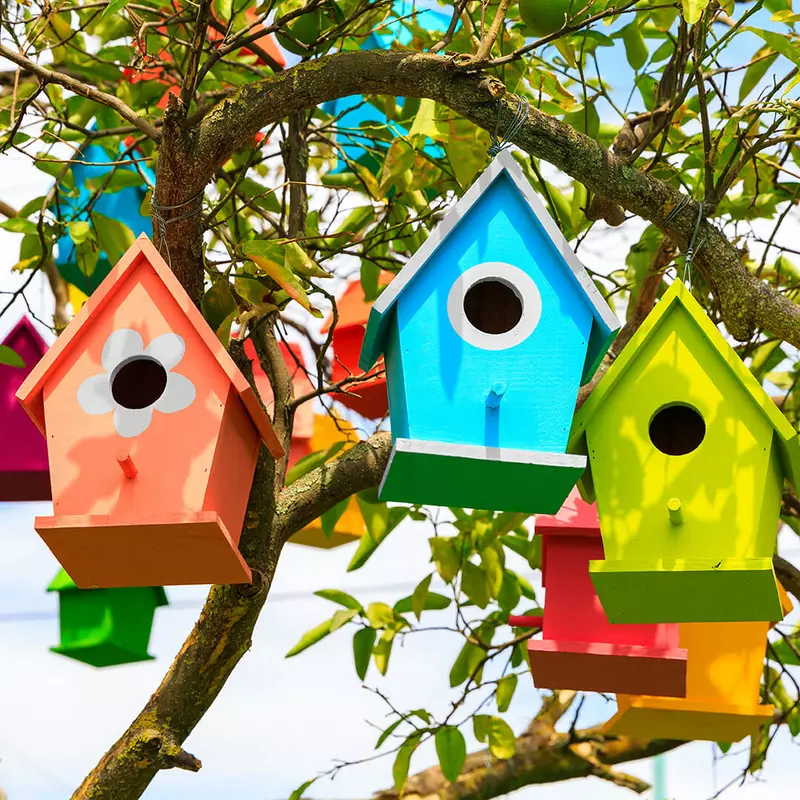
Ak máte z minulých projektov nazvyš lazúry alebo vrchné nátery na vodnej báze, ktoré sú šetrné k životnému prostrediu, teraz máte skvelú príležitosť postarať sa aj o vtáčiky. Oživte ich búdky a vytvorte vo vašej záhrade skutočný vtáčí raj. V závislosti na danom zvyšku farby sa rozhodnete, aký štýl chcete použiť. Ak máte k dispozícii niekoľko rozdielnych odtieňov môžete ich spolu zmiešať a vytvoriť tak širokú farebnú paletu, ktorá vám dodá viac možností pre kreativitu. Šrafovaním vytvoríte zaujímavé detaily so základom v bielej farbe. Nezabudnite na detaily ako sú rám dverí alebo strecha so zaujímavým vzorom. Pred začatím práce, odstráňte staré nátery a poriadne pripravte povrch na čerstvú aplikáciu. Pred zavesením búdok sa uistite, že je náter suchý. Popustite uzdu svojej fantázii a vtáčie búdky sa stanú skutočným umeleckým doplnkom vašej záhrady.
-
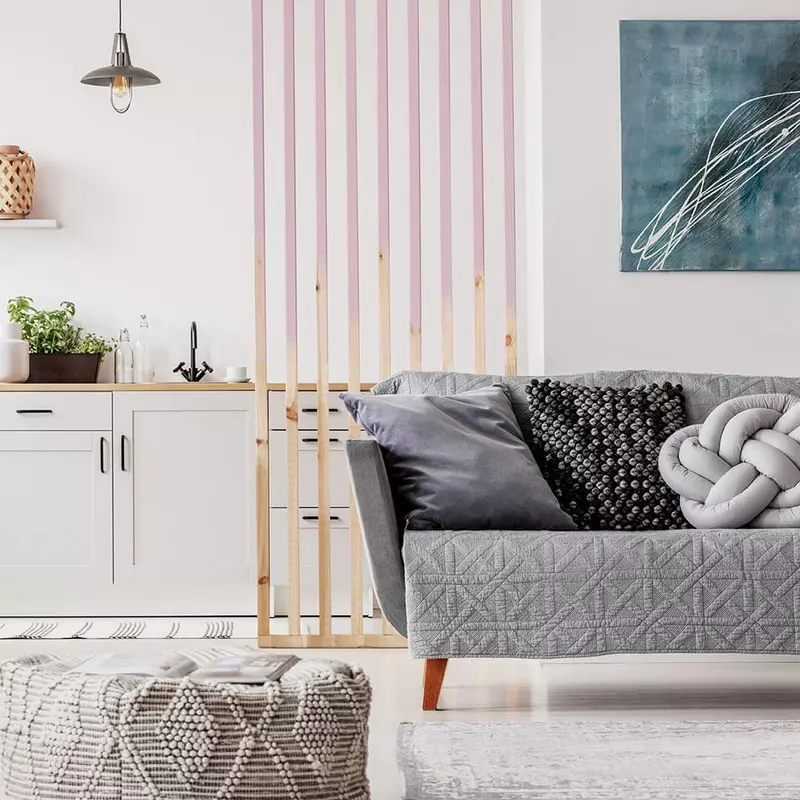
Vizuálne bariéry sú skvelým riešením pre vytvorenie útulných kútikov a pre rozdelenie priestoru. Drevené lišty môžete použiť na oddelenie obývacej izby od jedálne, organizáciu pracovného kútika alebo diskrétne vymedzenie priestoru na spanie v garsónke. Okrem funkčnosti taktiež ponúkajú možnosť vyjadriť vašu kreativitu. Prečo ich nenatrieť farbou čo vám ostala? Svojim priečkam môžete dodať osobitosť pomocou rôznych farebných akcentov: môžete vytvárať moderné geometrické línie, hrať sa s ručne maľovanými vzormi alebo skúsiť vytvoriť ombre efekt jemným zmiešaním dvoch odtieňov. S trochou fantázie sa drevená priečka stane skutočným umeleckým dielom, a zároveň praktickým doplnkom vášho priestoru.
-
Na začiatok si pripravte dostatočne veľkú pracovnú plochu a dobre ju ochráňte, pretože ide o techniku, ktorá doslova prská všade. Z vázy, dekoratívnej misy alebo iného dekoratívneho prvku, ktorý vás už omrzel, vyčistite všetky nečistoty a prach. Pred začatím maľovania sa uistite, že povrch je úplne suchý. Zábava sa môže začať. Vyhľadajte zbytky farby a v prípade potreby ju trochu zrieďte, aby farba nebola príliš hustá. Potom nájdite štetec s veľmi hustými štetinami, ktoré vytvoria väčšie a rovnomernejšie vzory. Namočte štetec do farby a potom naň zľahka poklepte palcom tak, aby farba striekala na prvok. Na vytvorenie rôznych veľkostí vzorov môžete použiť rôzne techniky klepania, preto je vhodné začať cvičením na starých novinách a zdokonaliť techniku, ktorá vám najlepšie vyhovuje.
-
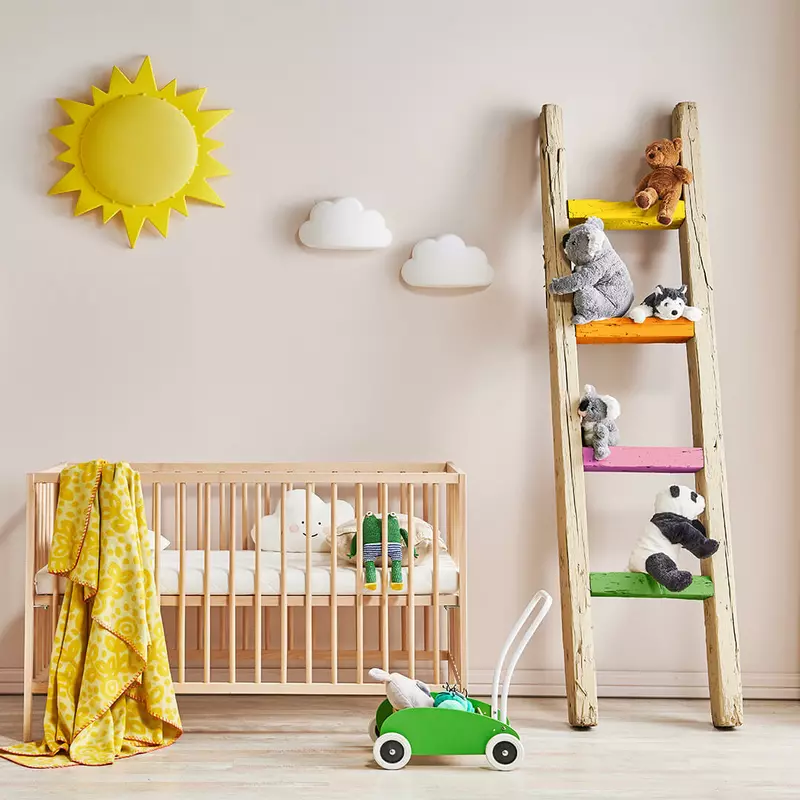
Na čo sa dá použiť starý rebrík? Napríklad pre malé divadielko s prstovými bábkami! Pripevnite na dlhšiu stranu obrus alebo záclonu, ktorá poslúži ako divadelná opona a predstavenie môže začať. Pokiaľ práve nebude prebiehať žiadne predstavenie, môže sa rebrík využiť ako preliezačka. Môžete postaviť most nad desivou priepasťou medzi posteľou a stoličkou, kam sa odvážia len tie najotrlejšie hračky. Rovnako ako v skutočnej džungli z neho môžu visieť liany a jedovaté hady, ktoré až príliš nápadne pripomínajú staré šnúrky omotané okolo tenkého drôtika. Pred hrou rebrík dôkladne zbrúste, aby ste odstránili prípadné triesky a poškodené časti, ktoré by mohli poškodiť jemné detské rúčky, a čerstvo ho natrite. Uistite sa, že je rebrík počas detských hier správne zaistený a že je bezpečný.
-
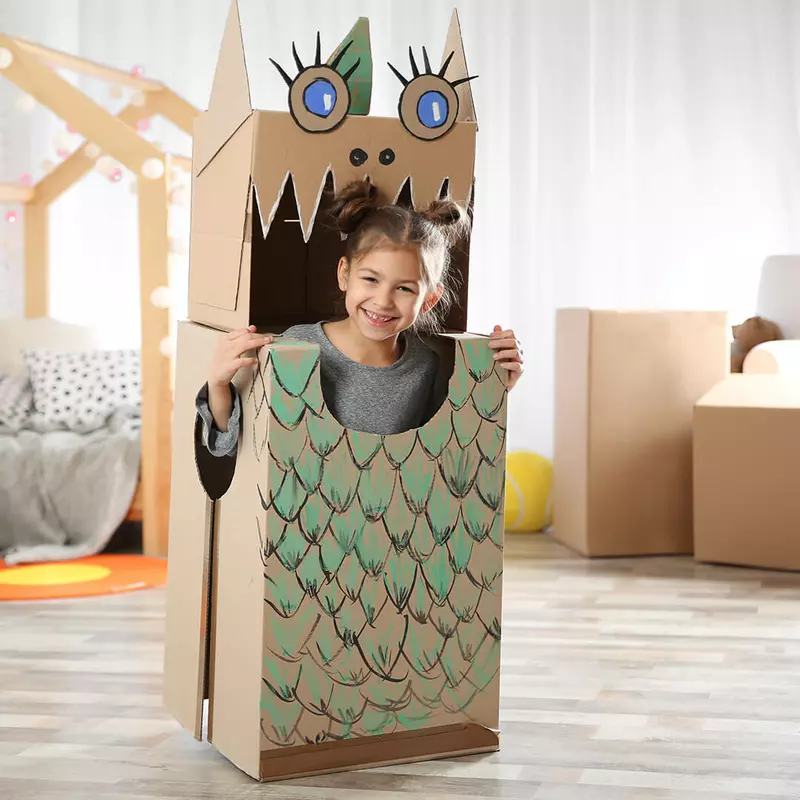
Pamätáte si ešte na časy, keď boli veľké kartónové krabice jednou z najzábavnejších hračiek? Sú vynikajúce na vytváranie vysnívaných hradov alebo mocných pevností alebo na výrobu krabicových príšer a iných tvorov, na ktoré sa môžete premeniť, ak vypichnete niekoľko otvorov pre ruky, nohy a oči a škatuľu si prehodíte na hlavu. A aj menšie kartónové krabice či kartóny majú svoje čaro. Môžete si zostaviť nákladný vlak s tisíc a jedným farebným vagónom, ktorý sa môže vydať na dlhú fantazijnú cestu po rovinách a náhorných plošinách, cez obývačku, chodbou, kolom v kúpeľni a späť do kuchyne. Pre zábavu, ktorá je o niečo menej krabicová, môžete použiť starý kartón namočený vo vode a kúsky mokrých novín na vytvorenie figúrok rôznych tvarov – či už ide o zoologickú záhradu, farmu alebo farebnú skupinu mimozemšťanov. Začínajúci umelci si užijú viac zábavy pri vytváraní vlastných hračiek ako pri hraní sa s nimi. Potrebujete len trochu zbytkov farby z vašej poslednej renovácie a starej kartónovej krabice.
-
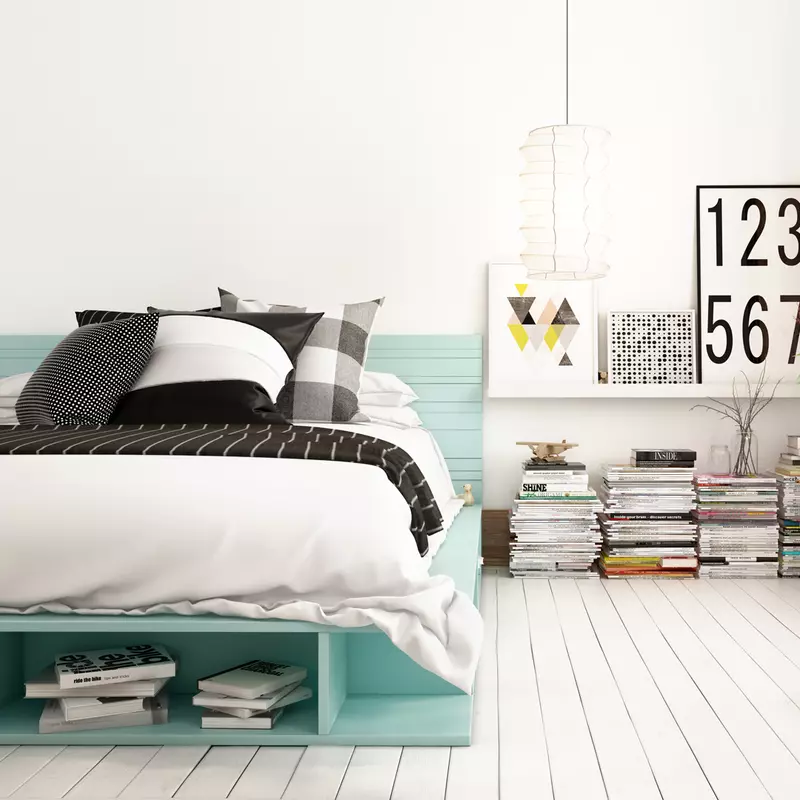
O výrobe vlastného nábytku už sme písali. Väčšie kusy nábytku bezpochyby vyžadujú nejaké znalosti a zručnosť, ponúkajú však aj skvelú príležitosť na rozvoj nielen vašich remeselných zručností, ale aj kreativity. Každý kúsok nábytku by mal byť perfektne prispôsobený vašim osobným záujmom a potrebám a zvyšky farieb môžete nájsť priamo doma. Dôkladne premyslené riešenia tiež môžu násobiť svoju funkčnosť; z rámu postele sa dá vytvoriť polička na knihy alebo priestor na nepoužívané vankúše a periny, aby ste ich mali po ruke v prípade, že vás prekvapí chladná noc. Ak máte domácich miláčikov, môžete pre nich vymyslieť napríklad aj útulný pelech na spanie, ktorý im poskytne ďalší azyl a pocit bezpečia. Ak už sú vaši miláčikovia zvyknutí spať priamo s vami, zvážte samozrejme iné riešenia, pretože pochybujeme, že by sa tak ľahko vzdali vašej teplej postele.
-

Obloženie stien je skvelým riešením, ako dodať nevzhľadným a veľkým povrchom štýlový a sofistikovaný vzhľad. Jednoduchým zásahom dodáte priestoru nový rozmer a vhodným umiestnením obloženia ho aj opticky zväčšíte, uzavriete alebo zdvihnete strop. Obloženie je možné umiestniť zvisle, vodorovne alebo v ľubovoľnom vzore. Môžete vytvoriť rámy, ktoré zdôraznia obrázky, zrkadlá alebo iné ozdobné prvky, prípadne použiť tvarované obloženie stien, ktorým vytvoríte oblúky nad dverami či oknami. Pokiaľ ho natriete vo farbe steny, môžete ho použiť ako diskrétne rámovanie pre LED svetlá, ktoré môžu byť skvelé pre vykúzlenie ambientného osvetlenia, ktoré ešte viac prispeje k útulnej atmosfére. Obloženie stien môže tiež fungovať ako prechod medzi dvoma rôznymi farbami na stene, čo je obzvlášť užitočné, keď chcete rozdeliť dve farebné schémy alebo vytvoriť optickú deliacu čiaru medzi priestormi s rôznymi funkciami.
-
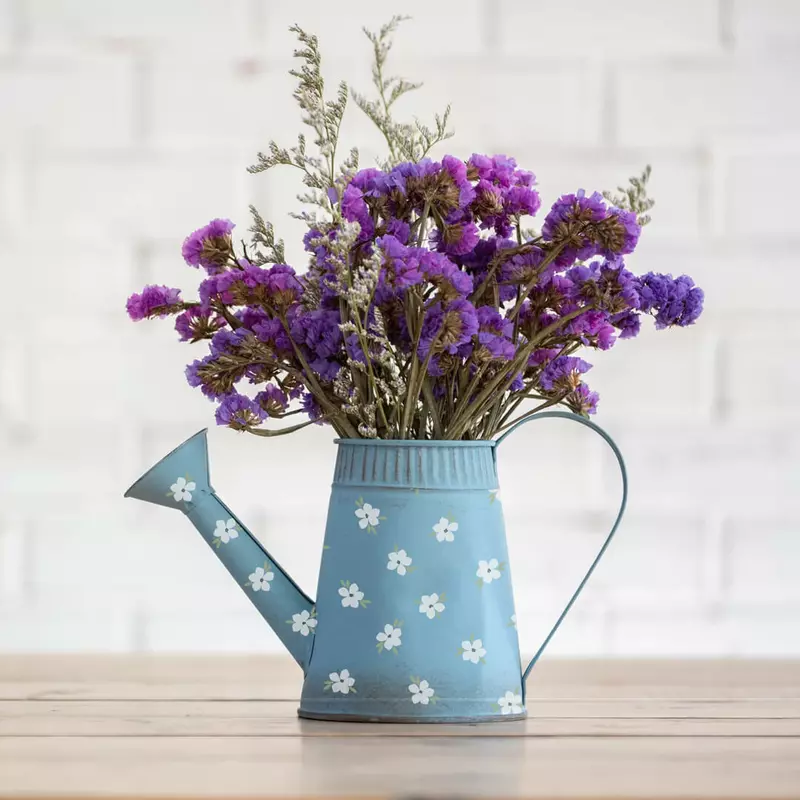
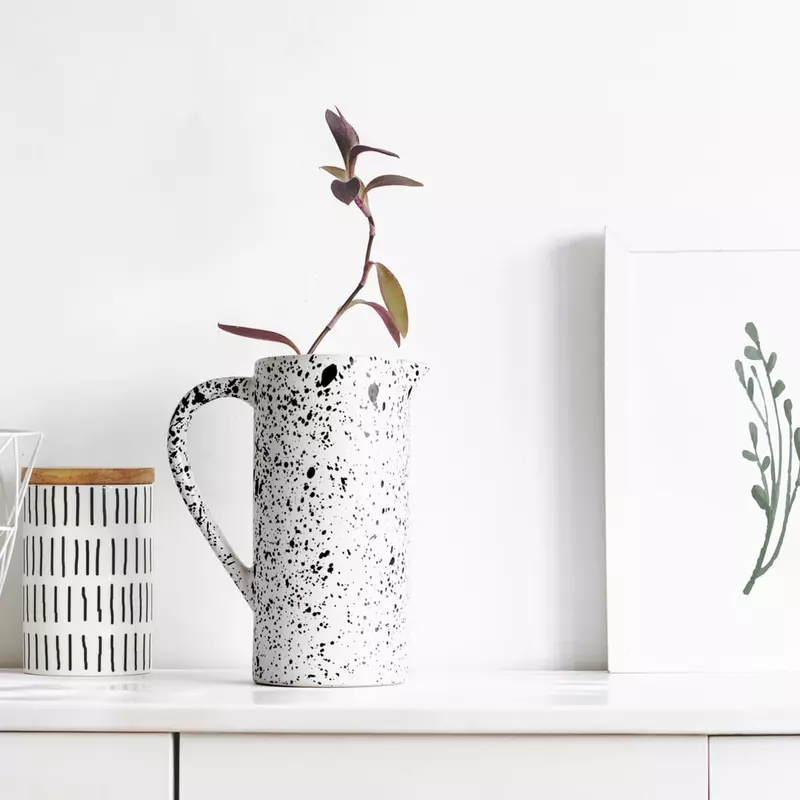
Doprajte svojej starej kanve, ktorá už poslúžila svojmu pôvodnému účelu, nový životný smer a s iba troškou zvyšnej farby ju použite ako vázu na kvety. Či už ju necháte na záhrade, na terase alebo na okennom parapete, bezpochyby pritiahne pozornosť zvedavých okoloidúcich. Staré kanvy sa dajú použiť aj ako jedinečné osobné darčeky pre osoby, ktoré milujú udržateľné a kreatívne riešenia. Inšpiráciu pre vzory môžete hľadať v prírode a vytvoriť rôzne rastlinné motívy s drobnými kvietkami, vínnou révou a kvetmi alebo kanvu oživiť pomocou hravých bodiek. Na podčiarknutie osobitosti môžete pridať aj jedinečný krátky textík alebo citát. Ak chcete kanvu využiť ako darček, nezabudnite k nej pridať kyticu lúčneho kvetu a veľkú mašľu.
HĽADANIE INŠPIRÁCIE V KNIŽNICI NÁPADOV
Dokončili ste maľovanie vášho domova a máte nejaké zvyšky farby, ale neviete, čo s nimi. Nevyhadzujte ich; aj malé množstvo farby dokáže osviežiť a zmeniť vzhľad nábytku, bytových doplnkov či stien.
Keď už ste začali s tvorivým procesom, oplatí sa prehľadať police v pivnici, špajzi či garáži, kde môžete naraziť na nejaké zabudnuté zvyšky. Farby môžete tiež miešať a vytvárať tak z rôznych zvyškov celý rad nových odtieňov. Farby ale zmiešavajte len, ak sú vyrobené na tej istej báze; nemiešajte spolu nátery založené na vode a rozpúšťadle. Po vymaľovaní často zostane nejaká biela farba, ktorá je skvelým základom pre tieňovanie. Dá sa zmiešať s akýmkoľvek zvyškom farby na steny založenej na vodnej báze, alebo s obyčajnou akrylovou, či temperovou farbou, ktorú nájdete v školských pomôckach.